
Arduino may seem very rudimentary, but it's more than enough to create even fairly advanced projects. With the help of some existing modules on the market, such as camera modules, and with the help of some libraries or APIs, you can equip your project with intelligence or computer vision . This will open up new applications and new horizons beyond rudimentary projects.
Computer vision is a type of computer vision. It's not simply about capturing an image with a digital camera; it goes much further. It can be used to acquire environmental data , process images, analyze them, understand real-world images, and more. For example, it could be used to obtain numerical information from the camera, recognize human beings, and so on. Imagine all the possibilities!
What is computer vision used for?
For example , many current vision systems are based on this type of vision, such as some vehicles that allow automatic parking, environment mapping, traffic control systems on roads, or recognize pedestrians to stop the vehicle and avoid hitting them, recognize faces and obtain data from people registered in a database as in some security systems, analyze videos, etc.
The potential of this computer vision is so vast that governments and large corporations use it for a multitude of purposes, both legal and otherwise. Some practical applications you're probably familiar with include:
- Facebook: use this type of artificial vision for photos uploaded to your social network, in this way you can recognize faces using complex algorithms. That way you can feed your AI to make it more powerful and improve it for other future applications.
- Flickr- You can use this machine vision to reconstruct 3D scenes using image repositories on this platform.
- Industry: With artificial vision systems you can detect defects in an assembly line, quickly discard objects with defects, etc. For example, when the fruits collected in the agricultural sector travel through a conveyor belt, by means of an artificial vision sensor, broken, damaged, rotten fruits, or objects other than fruits, could be detected to remove them by means of a jet of air or other mechanisms.
- CCTV: it can be used in many protected centers to capture certain vehicles or people, find out who they are and send said information to a system or record it for later analysis. Many companies even use it to find out how people dress (fashion sector), certain entities to find out who may have been in demonstrations, detect the presence of suspicious personnel in public or busy centers, etc.
Keep in mind that there are currently many surveillance cameras of all kinds scattered throughout the streets, whether for monitoring businesses, banks, traffic authorities, etc., so a large amount of information is collected from all of us …
Necessary material

In addition to the Arduino board with its programmable microcontroller that utilizes libraries, you'll also need other essential components for your project. Among them, of course, is a camera module capable of image processing. An example of this is the Pixy CMUCam 5 or similar . This module has a powerful processor that can be programmed to send information captured by the sensor via the UART serial port, SPI, I2C, digital out, or analog signals.
The Pixy CMUCam 5 can process up to 50 frames per second (50 FPS). With this capability, it can be programmed to send only the images you want or need to find, instead of constantly recording all the video it captures. For easier operation, it has a free, open-source application called PixyMon for control.
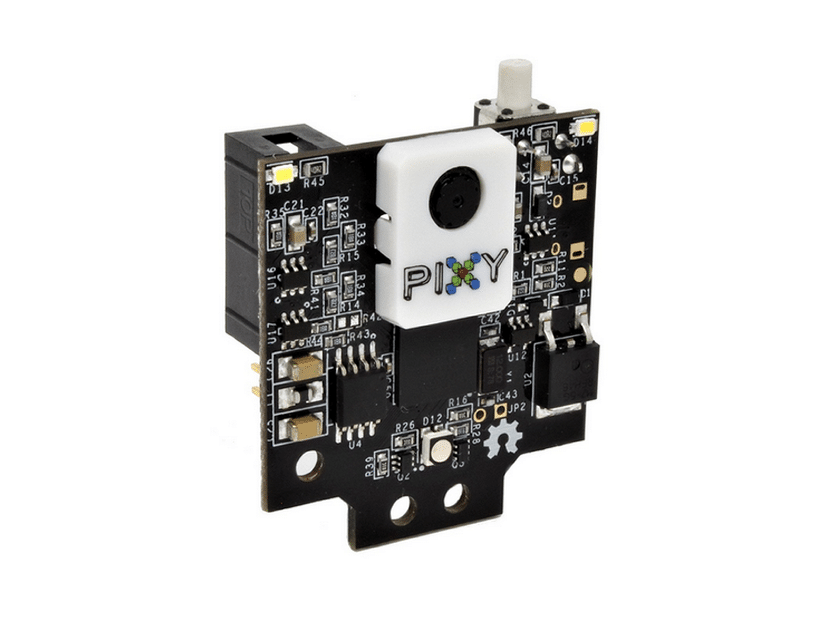
If you decide to purchase this Pixy CMUcam5 camera, it will come with a 6-pin to 10-pin IDC cable and the mounting screws. The module's technical specifications are as follows:
- NXP LPC4330 204 Mhz DualCore processor.
- 254 Kb RAM memory,
- 140mA consumption.
- Image sensor Omnivision OV9715 of 1/4 ″ and resolution of 1280 × 800.
- Viewing angle of 75º horizontal and 47º vertical.
- Simple image recognition to locate objects.
- You can use it with Arduino boards (with specific libraries), Raspberry Pi, BeagleBone Black, and other similar boards.
- Communication ports: SPI, I2C, UART, USB, or analog / digital output.
- PixyMon software compatible with Windows, macOS and GNU / Linux.
- Small size.
- Documentation available on the project Wiki.
- Github repositories with the library for Arduino.
- Firmware
- Tutorials
In addition, you should be aware that you have access to other types of APIs, libraries, and other resources that can help you create all kinds of projects using these cameras and computer vision. For example, the following should be highlighted:
- OpenCV: is a free machine vision library initially developed by Intel. It has now been released under the BSD license and can be used by anyone to detect motion, recognize objects, robotic vision, facial recognition, etc. It is cross-platform, so it can be used on GNU / Linux, macOS, Windows and Android.
- Other projects, such as vehicle detection.
From Hwlibre, I encourage you to start experimenting and learning about this discipline …
Simple example of integrating Pixy 2 CMUcam5 with Arduino
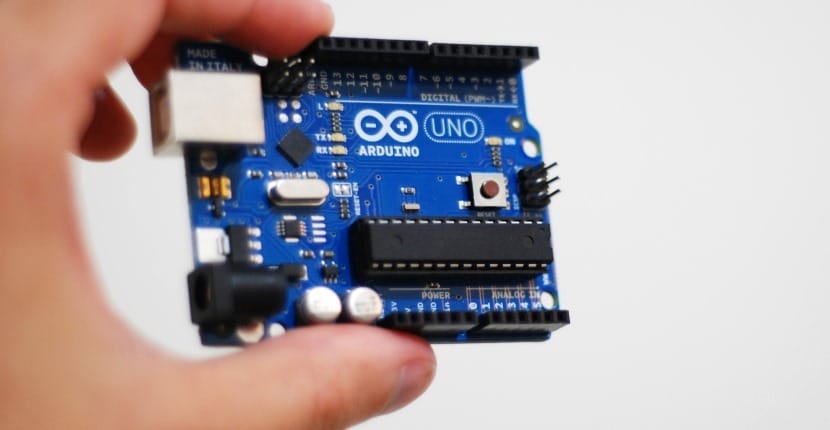
To use this Pixy 2 CMUcam5 module with your Arduino board , you'll need a few extra components. For example, you can use an S06NF servo motor, or similar , to activate when the camera detects an object you've programmed it to. Of course, you'll also need to download the PixyMon software I mentioned earlier and the Arduino library from GitHub.
For more information on Arduino programming, you can download our free PDF course.
Once you have installed PixyMon on your operating system, the next step is to follow these steps:
- Connect the Pixy with the USB cable and check if the RGB LED of the module is on, which will indicate that it is working properly.
- Open the PixyMon app and if everything is correct you will see what the camera is capturing at this moment.
- Go to the submenu Action or Action, and then click Set signature or Set signature. Now the video should freeze and you can select what color or object you want the camera to detect as long as it is in front of the sensor. For example, you can use a ball. That way, whenever the ball passes in front of the sensor it will be detected.
- As you can see, there is up to 7 Set Signature, so you could configure up to 7 different objects that the camera can detect.
- If you only choose one, you can move on to the next step. Or if you want to remove an object from the list, you can go to the Action or Action menu, and then Delete all The signatures or choose Delete Specific signature. You can even go to Configuration or Configuration and then go to the specific signature that you want to modify to change it….
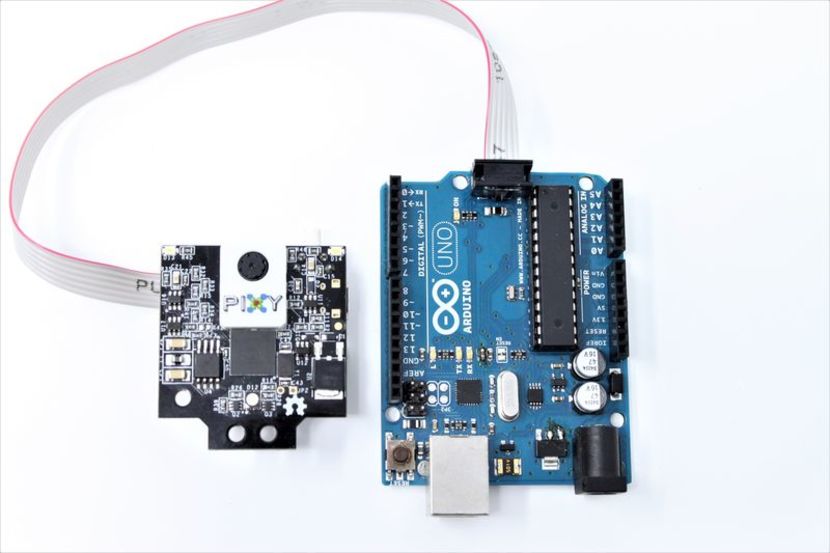
Now you can proceed to configure your Arduino board , if you wish. To do this, you already know you must use the Pixy library for Arduino. This library also includes simple examples that you can use to start experimenting without writing code from scratch. Simply open and run these sketches or make modifications to them to see how they behave. To obtain this library, you can follow these steps.
- Download the library for Arduino.
- Opens Arduino IDE.
- Go to Sketch, Include library and then Add .zip library and select the one you downloaded.
- Now it will be integrated, you can start testing some example with the camera properly connected to your Arduino board. To do this, go to the Examples or Examples menu, then to Pixy and select one of them. I recommend you start with hello_world.
- With your Arduino board connected by USB to PC, upload the sketch to your board, then select Tools and then Serial Monitor.
- Now, the window will begin to show you information.
Of course, don't forget to connect all the necessary electronic components to your Arduino board, including the camera itself. As you know, it connects to the Arduino's ISCP pins designated for these modules, as shown in the image…
Table of Contents